What you’ll learn:
Editing video to the beat of music
You’ll find lots of videos out there where the editing is driven by the beat of music. Music videos, of course, but also other videos like commercials or demo reels. Cutting video to the beat of music is often a powerful method of driving the action and getting your message across to your audience in an engaging, exciting, and memorable way. This style of rhythmic editing can inject energy into a scene, and if you want to learn how to edit music videos then it’s a really useful skill to learn.
Read on to learn how VEGAS Pro can put you a leg up on the competition with its quick and easy tools which you get you cutting to the beat in no time! It’s really easy to do and it’s great for drama, vlog and music video editing alike!

VEGAS Pro has deeps roots as an audio editing program. Because of this, you can take advantage of built-in features which make editing to the beat of the music a snap!
There are two major ways to edit to beats.


First, VEGAS Pro shows you incredibly detailed waveforms in your audio, letting you see the waveforms better than any other video editor. That means you can clearly see what you hear, and can visually identify important sounds in your music far more easily. It's then easier to cut your video to the time of the music – simply cut your video to coincide with the peaks that you see in the waveforms.
You can even zoom your timeline in to individual audio samples, and then position your audio events with sample accuracy for incredibly precise timing and alignment. VEGAS Pro gives you a level of precision for audio edits unmatched in any other NLE! But as powerful as that is, it’s not even the easiest way to edit to musical beats. To make your job even easier, you can edit to a measures and beats ruler that's built right into the VEGAS Pro timeline.


Another technique you can use comes in handy when maybe you only have a short segment of your video that you want to cut to the musical beat. For instance, say you have a 10-second segment that you feel would be great cut to the music, but the rest of your video doesn't depend upon the beat so much. In these cases, you can mark out the tempo of the music on your own and quickly cut to it.
To do this, start well before the section you want to mark out and play your project. Poise one finger over the M key on your keyboard. Count along with the music so that you are in the groove with the beat.
When you get to the portion of your video you want to mark out by tempo, press the M key in time with the music. Each time you press it, you add a marker to your timeline, and those markers coincide with the time of your music. You decide whether you want to mark every beat, just two beats of each measure, or whatever makes sense for the edit you need to make.
Once you have these markers in place on your timeline, you can use them to quickly snap your event edges to the beats in the music that they mark out for you. When you're done with your cuts in that section, you can choose to leave those markers in place for further reference, or you can delete them to clean up your workspace.
The previous two methods work great, but here's where VEGAS Pro really shines when it comes to cutting to the beat. VEGAS Pro lets you set up your timeline ruler not only according to frames of video, but also to the tempo of a of musical soundtrack. This makes it incredibly easy to cut your video quickly to the tempo of your backing track.
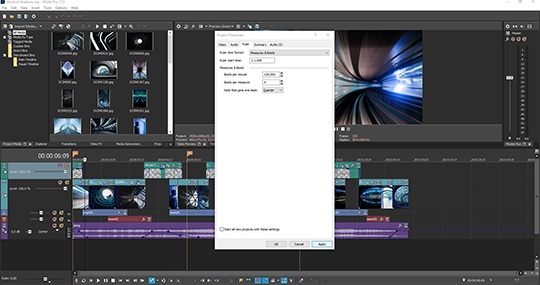
First, you need to let VEGAS Pro know the tempo of your music track. If you don’t know what it is, it's usually easy information to get from either the composer who created the music for you or from the metadata of the file itself, if you've acquired the music through a music licensing source such as a stock music library. Once you know the tempo of your music, choose File>Properties to open the VEGAS Properties dialog box. Click the Ruler tab. In the “Ruler time format” drop-down, choose Measures and Beats and click the Apply button. Notice that the VEGAS Time Display and the timeline ruler now show measures and beats instead of video frames.
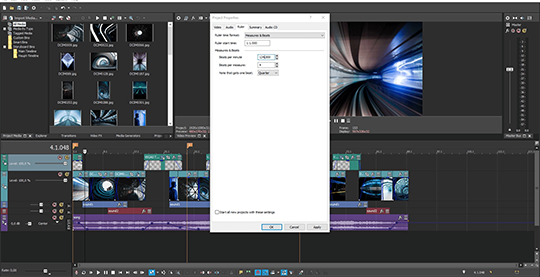
Enter the tempo of the song into the “Beats per minute” field. For instance, if the music composer tells you the song was recorded at 116 beats per minute, enter 116 into this field.
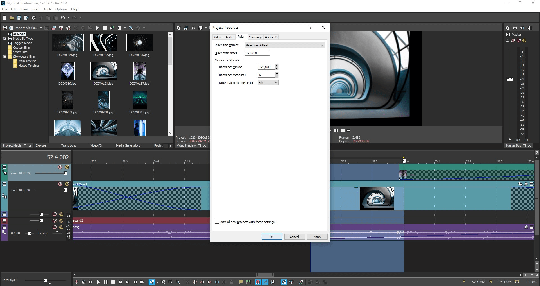
You then need to specify the time signature of your music. In most cases you can probably identify the time signature just by listening to the music. Most popular music genres typically record in 4/4 time, which means there are four beats per measure and each beat is a quarter of a measure long. Even people who are not particularly musical can naturally count along to the beat of a song and determine whether it is in 4/4 time or some other signature. But again, if you don't know the time signature of your song, you can easily get that information from the composer or the metadata, or just have a musical friend count it out for you! If you've determined that the time signature is 4/4, then you won't need to change the Beats per measure value or the Note that gets one beat value. The default settings reflect a time signature of 4/4.
However, if you find that the music's time signature is something else, then you need to change these fields. For instance, say your music was recorded in 6/8 time. In that case, set the “Beats per measure” value to 6 and the Note that gets one beat value to 8th. When you're done specifying all these settings click OK to close the Properties dialog box.
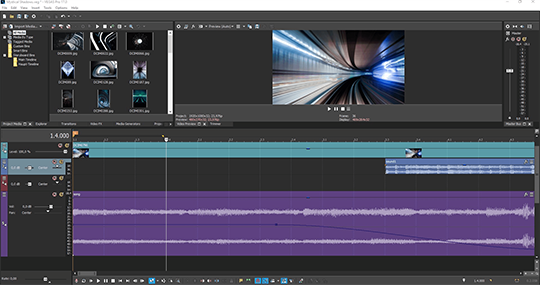
Here's where those waveforms come in handy again. Listen to your music and watch the waveforms. Determine where the first beat of the first full measure (or any measure near the beginning of your file) is. Then, line the waveform that corresponds to it up to the first beat of a logical measure on your time ruler. For instance, line that first beat waveform up with 2.1 on your time ruler to line the waveform up with measure two beat one.
Now you can be sure that all measures and beats line up with your background music (as long as that music's tempo doesn’t change somewhere in the piece), making it incredibly easy to cut your video right to the beat of the music, with the ruler as your guide. And you can always verify the timing with a quick glance at the waveform.
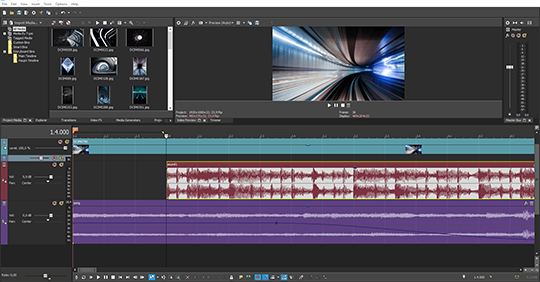
What’s more, with the timeline set up this way, you can even substitute other music of the same tempo and time signature and it will line up automatically, freeing you to experiment with different pieces of music or different music takes!

One thing to keep in mind involves the Quantize to Frames feature in VEGAS Pro. When you're editing an audio-only event, VEGAS ignores this setting, but for video events, by default VEGAS Pro snaps your edits to the nearest video frame. This prevents you from accidentally creating video edits between frames which could bring unpredictable and undesirable results. When you're editing video frames to the beat, if you're zoomed into your waveform far enough, you'll likely notice that VEGAS Pro quantizes your edits to the nearest video frame and thus the edits don't necessarily line up perfectly with the beats on your time ruler. You'll feel like VEGAS Pro isn't letting you cut your video exactly where you told it to, and you'd be right. The Quantize to Frames feature always makes your video edit on the nearest video frame as defined by your video properties.

In general, you don't need to worry about this. It's usually far more important that your video edits happen exactly on video frames rather than exactly on the beat of the music. And in most cases the edit will be close enough to the musical beat that the viewer won't notice that it's not exactly on that beat. In those rare cases where it seems noticeable to you, you have to decide either to live with the cut being slightly off the beat, or make the cut somewhere else. In almost no case should you override Quantize to Frames and make a video cut in between frames, because you're almost always asking for trouble if you do this.
VEGAS software makes it easy to synch a cut to a musical note or a sound effect by displaying the waveforms of your sound down to an incredible level of detail. You can zoom in on your waveform to an unparalleled level and find the exact bit of sound you want to synch your cut to.
Get a quick insight with our video sample illustrating how to cut to the beat of the music.


What's the difference between VEGAS Pro and VEGAS Pro Suite?
